Here is a guide on how to get Steam Workshop mods onto your Atlas server.
Step 1 ) Find your Mod Workshop ID's.
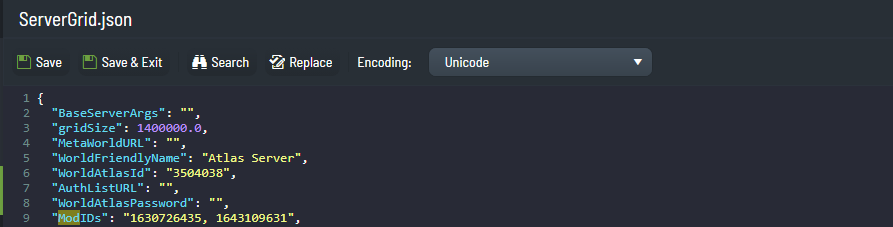
Step 2 ) Go to Configuration Files and open your ServerGrid.json in the Game Panel and open it in the text editor.
Step 3 ) In a new tab, go find the Steam Workshop mods you wish to install.
eg. https://steamcommunity.com/sharedfiles/filedetails/?id=1630726435
Take the ID number after ID=, in the above example this is 1630726435
Step 4 ) Under the "ModIDs": "", section in the ServerGrid.json, add your WorkshopModID's between the brackets, separated by commas for multiple mods.
eg. "ModIDs": "1630726435,1643109631",
Step 5 ) Save the ServerGrid.json
Step 6 ) Start your server, your mods will automatically download on server startup and will launch.
To add more mods, simply follow the steps above again, adding more mods separated by commas to the mod section of the servergrid.json